
1.1: Online DICOM Image Viewer (ODIN)- An Introduction and User Manual
- Page ID
- 14774

Throughout this eBook you will find images of normal anatomy, normal scans, and images of abnormalities. These static images are simple JPEG files, and although they will be helpful to you in learning the content, they do not accurately represent the imaging that clinicians would use in their practice. To do so, one would require a Picture Archiving and Communication System (PACS), which allows clinicians to interact with the image by zooming, changing level and window, annotate with circles, arrows and text, and scroll through image data sets.
To help fully appreciate normal anatomy and pathology, you have access to an Online Dicom Image Navigator (ODIN), which gives you access to a more extensive imaging database, in a PACS-like format. They additional images associated with a case are available by clicking the ODIN Link. It will enrich your imaging experience if you take advantage of the additional learning material in the ODIN image repository.
ODIN is not a fully functional PACS software suite but it will give you the chance to view the images with some enhanced features that simulate a PACS. The only images that you can change the level and window for are CT images. You can pan, zoom, scroll, through image data sets. You are also able to annotate, and save, the images in the database for your own teaching and learning strategies. The links to the ODIN content are provided below the thumbnail image(s) in the eBook.
You are also able to search and view other cases in ODIN, to help improve your understanding and exposure to the various imaging techniques and abnormalities. There are many other interesting cases in ODIN.
ODIN User’s Guide – Laptop or Desktop Web Browser
Version 1.4 – June 1,2017
ODIN (Online Dicom Image Navigator) is a server based, HTML5, DICOM image viewer that displays cases created in the U of S MIRC Teaching File. The cases displayed are images without text or reports. The images are anonymized to protect patient confidentiality. Do not use Internet Explorer as your browser. We suggest Firefox, Goggle Chrome, or Safari.
ODIN images can also be accessed specifically by using their case specific urls. These urls can be embedded in a slide, document, or pdf.
ODIN Link for ODIN Home/Search page: mistr.usask.ca/odin/
Table of Contents – ODIN
- ODIN Search Page
- General Image Display
- General Toolbar
- Image Annotation Tools / Colour Palette Tool
- Angle Measurement Tool
- Unselect the “Annotation Tool”
- Download Image and Annotations Tool
- Image Sets with Multiple Stacked Images (CT, MR, US)
- Looping Speed Tool
- Move/Pan Tool
- Zoom Tool
- Reset Image (window values, zoom, position (pan), rotation, etc.) Tool
- Directory / Open a New Teaching Case Tool
- Image Layout Tool
- Toggle Text Overlay Tool
- View Metadata Tool
- Use the Window Tool
- Set Window Center and Width Values Tool
- Vertical Flip Tool
- Horizontal Flip Tool
- Rotate Image Left (counter clockwise), Rotate Image Right (clockwise) Tool
1. ODIN Search Page
If you access ODIN via the home page or search page you must search for a case using the search tool that appears.
There are multiple libraries available in MIRC that can be searched, as a whole, or one can select specific libraries for searching. You can toggle the libraries on or off and you can select specific libraries by using the radio buttons. Enter your search criteria in the search box and hit the return key or the “Search” radio button. You can curtail your search by keywords and the pull down menus next to the “Search” button.

This viewer can also be activated when you click on a link in the U of S BlackBoard Learn LMS if your class has incorporated imaging links into the course content. If you select a link in BlackBoard Learn you will be directed to the case specifically, bypassing the case directory in ODIN. A new page will open in your web browser displaying the images for the case you selected while in BlackBoard Learn.
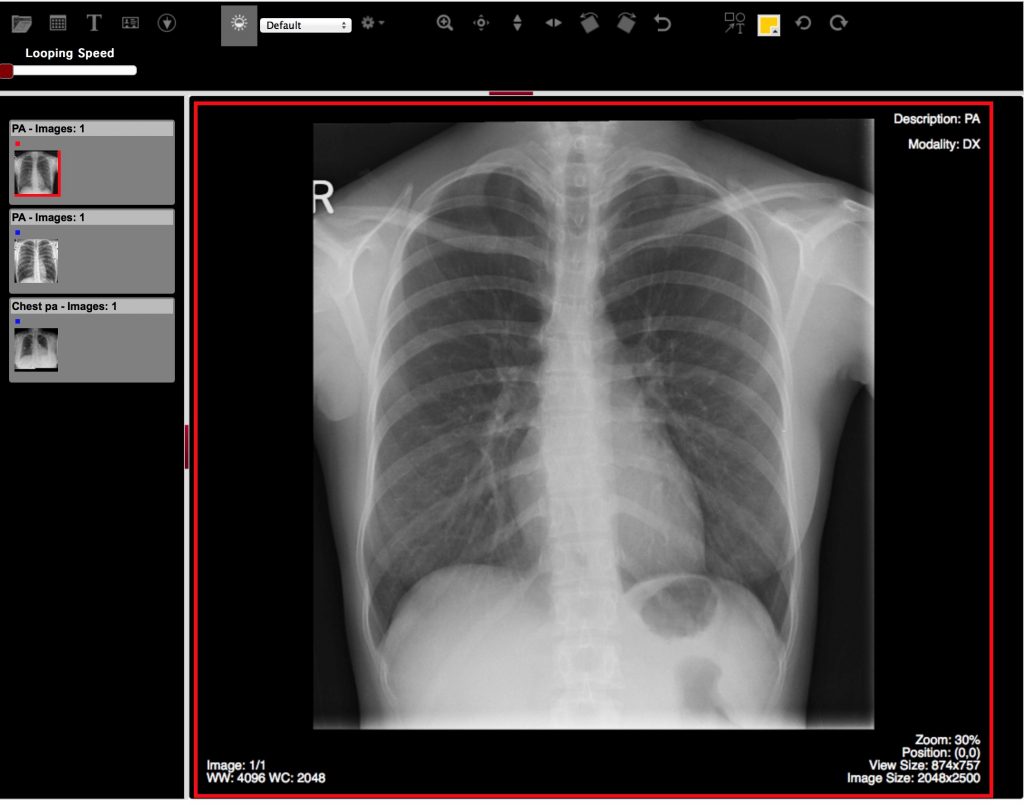
2. General Image Display
All of the images available in the case are displayed as thumbnails on the left when the case first opens. The default image view is a single image filling the viewing pane.
The images in the case are shown as thumbnails in the left column. The active image displayed is highlighted in red in the thumbnail list and on the image pane.
You can left click the other thumbnail images to activate them in the main image viewer.
You can view and alter the appearance of the displayed images but it is not possible for you to alter, damage, erase, or destroy the cases stored in the ODIN viewer.
If necessary, you can export any image that you have altered or annotated. These images you have created can be used for teaching, examinations, learning, or research purposes. If you use any images for these purposes please acknowledge the source in your work.
3. General Toolbar
There is a tool bar across the top of the window. This has a variety of image viewing features. If you hover your pointer over the icon a pop-up box will identify the task this icon will execute.

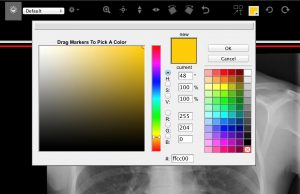
4. Image Annotation Tools/Color Palette Tool
The Image Annotation icon allows you to select the line, arrow, circle, box, text tool, and angle measurement tool.
The line tool also acts as a ruler and there is an angle measurement tool as well.
The color panel next to this tool allows you to select a color for your annotation activities. Different colors can be displayed on the same image.

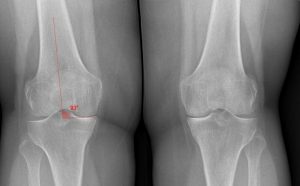
5. Angle Measurement Tool
This tool allow you to measure angles. To use, activate the tool in the pull down menus, click on the first anchor point and drag to the next anchor point, release the mouse button, then move your mouse to the next anchor point and click. An angle, with the numerical measurement will be displayed.

6. Unselect the “Annotation Tool”
In order to deactivate or unselect the Annotation tool you currently have in use the “Unselect Annotation” tool.

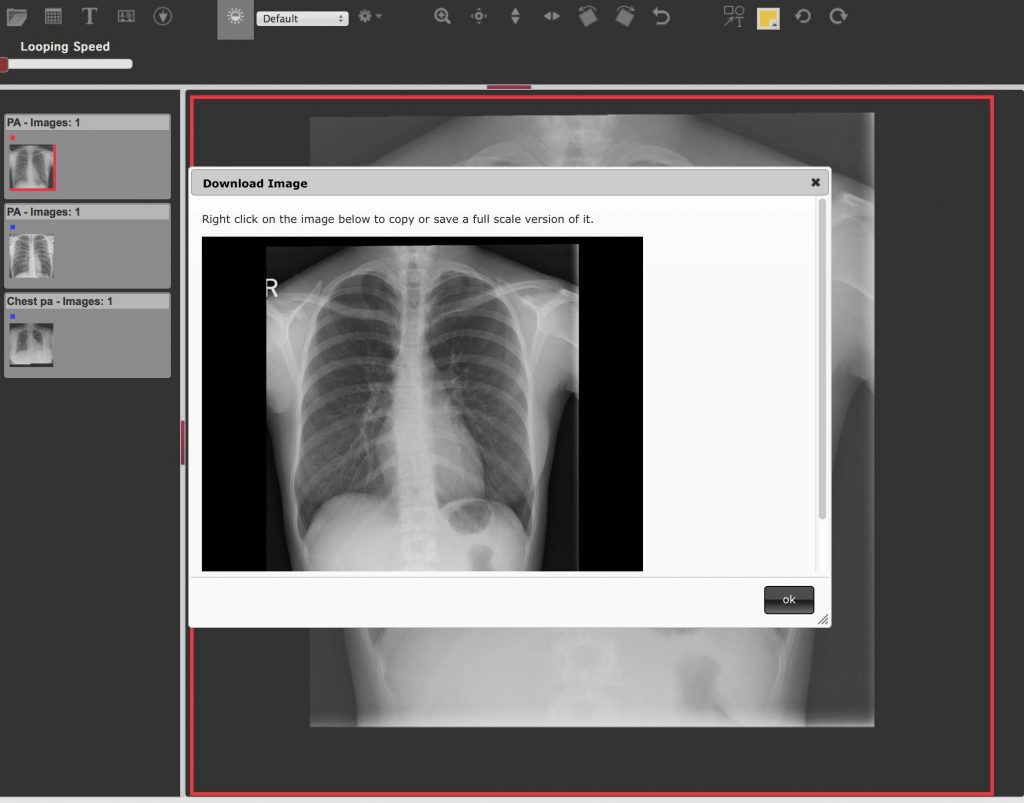
7. Download Image and Annotations Tool
The downward pointing arrowhead in the tool bar allows you to download the displayed image for use in lectures, PowerPoint talks, and for assignments. This will be used when you have completed the annotation of an assignment image and wish to download it to save and send to the instructor for grading.

After you left click this icon you will be presented with the following instructions for downloading the image in the viewer pane.
8. Image Sets with Multiple Stacked Images (CT, MR, US)
If a case has stacked images you will see the full image set in the thumbnail list as multiple small boxes. At the bottom of these stacked, small, boxes, you will see three larger thumbnails. These represent the first, the middle, and the last image in the stack. You can click on them to move to these images. You will see in the small box display that the currently viewed image is highlighted with a small red box. The middle and last images are small blue boxes. You can select any one of the small boxes to go directly to that image in the stack.

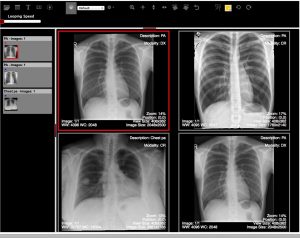
9. Looping Speed Tool
If you are viewing a image data set that is a stacked image series i.e. sequential images anatomically stacked from cranial to caudal or right lateral to left lateral, you can view these like a cine movie clip. This is something that could be an option for sequential MRI, Ultrasound, CT, or Angiography images. To activate this function slide the red button on the Looping Speed Tool to the right and adjust the speed to suit yourself. To stop looping, slide the red button back to the far left and release it. Do not try and stop the Looping Tool by reloading the web page as this will generate an error and you will need to restart your browser. Crashing on reload happens with Mac Safari but not with Firefox.

10. Image Set Scroll Bar
When an image set is available that allows for scrolling you will also see a scroll bar on the right side of the image pane in the viewing window. You left click, hold, and drag this red slider tool to scroll through the image set. This is important for viewing sets of CT, Ultrasound, MRI, and Angiography images if they have been saved as a cine type image set.
11. Move/Pan Tool
The Move or pan icon allows you to move the zoomed image in the viewing pane to see different regions of the image in the magnified format.

12. Zoom Tool
The image Zoom tool allows you to magnify the image in the viewing pane.

Below, you will see the zoomed appearance of the heart shadow zoomed from the original image in this case. Due to the nature of the image format being displayed, it is possible to zoom the image quite substantially without loosing image detail.

13. Reset Image (Window Values, Zoom, Position (Pan), Rotation, etc.) Tool

As the tool name implies, this will reset the image to the native state of the original case.
14. Directory/Open a New Teaching Case Tool
If you accidentally close the ODIN web page you can retrieve it by clicking the link in the BlackBoard Learn page you were on. However, you will have lost any image changes you made using the tool bar icons unless you saved them as downloaded images. The ODIN case always reverts back to the native state of the case saved in the server.
You can see the other cases stored in the ODIN directory by left clicking the file folder icon on the top left of the toolbar. You will be presented with the Search Tool to look for other cases of interest.

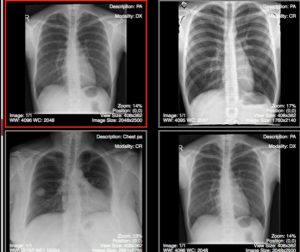
15. Image Layout Tool
The default image layout is a single image filling the viewing pane. You can adjust how many images are displayed in the main image pane, left click the second icon in the upper tool bar. This icon allows you to change the layout of the main image viewing pane. A box will appear over the image viewing pane that allows you to select the image tile formation.

For example, if you left click on the top left, single active image in the thumbnail list will be displayed one at a time in the viewing pane, as shown below. To see the next thumbnail image in a single plane, left click that thumbnail.
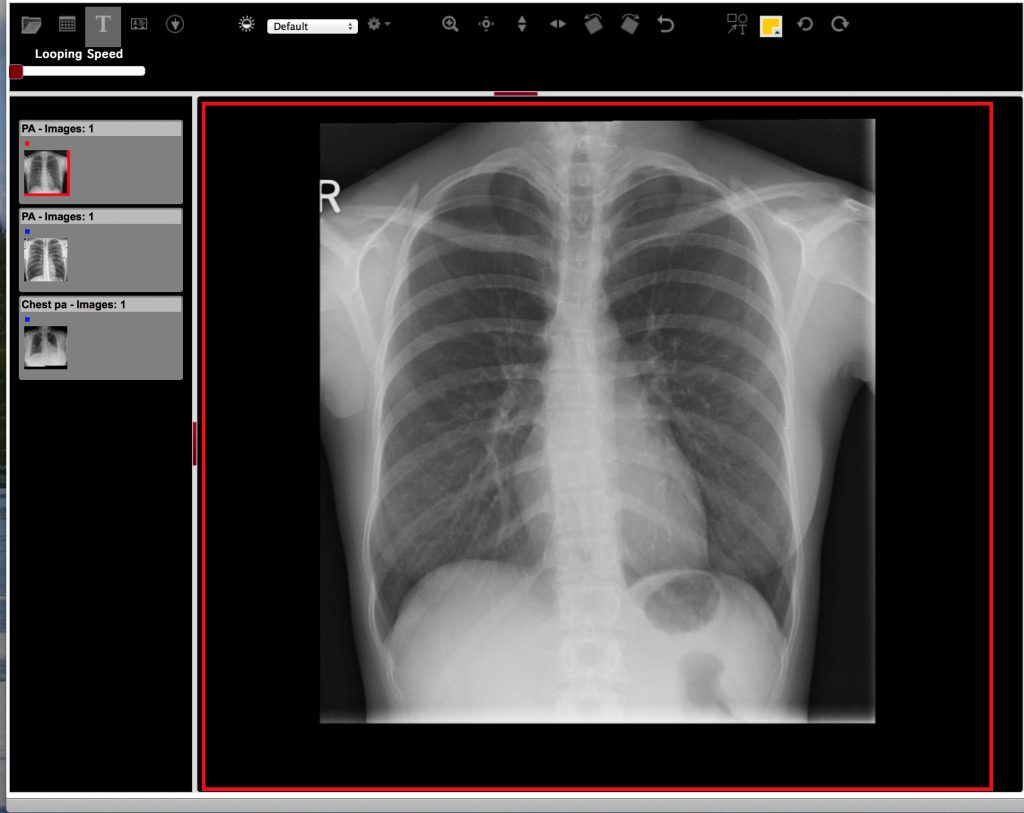
16. Toggle the Text Overlay Tool
Left clicking the “T” icon in the toolbar will toggle the text elements of the image off and on as seen below.
17. View Metadata Tool
If you wish to view all of the available, textual, metadata for the image being displayed, left click the metadata icon and the background metadata will be displayed.

The available metadata is displayed in a separate box overlying the image.

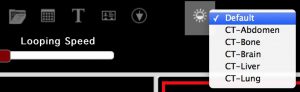
18. Use the Window Tool
All of the images displayed are presented with the window/level (brightness/contrast) optimally displayed for the type of image being viewed i.e. ultrasound, x-ray, etc. Left clicking this icon will allow you to change the window/level of the image being viewed using the pull down menu to the right of this icon once you activate this feature.

This is only pertinent for Computed Tomography (CT), as the image window/level for these types of images can be altered to optimally view different anatomic content i.e. bones, lungs, etc. The pull down menu allows you to select the features you wish to accentuate on the active window view pane.
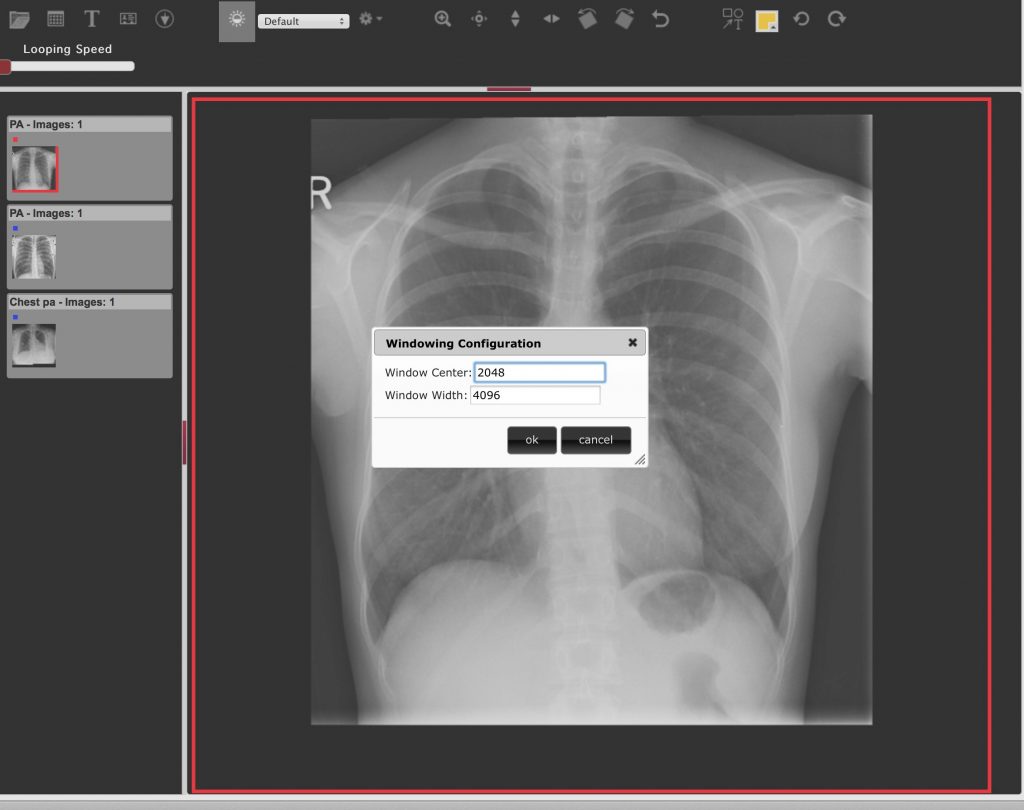
19. Set Window Center and Width Values Tool
If you feel that it would be optimal to manually adjust the window/level, you can enter in numerical units that will alter the image appearance to suit your purposes.

The dialogue box below will appear allowing you to adjust the image as you see fit.
20. Vertical Flip Tool
The two arrowheads pointing up and down allow you to flip the image in the vertical plane.

See below:

21. Horizontal Flip Tool
The two arrowheads pointing left and right allow you to flip the image on the horizontal plane.
See below.

22. Rotate Image Left (Counter Clockwise), Rotate Image Right (Clockwise) Tool
The grey boxes with the circular arrows over them allow you to rotate the image in the direction identified in 90 degree increments, you can rotate the image through the 360 degree circle. See below.


Attributions
All images in this chapter by Dr. Brent Burbridge MD, FRCPC, University Medical Imaging Consultants, College of Medicine, University of Saskatchewan is used under a CC-BY-NC-SA 4.0 license.