
4.3: Simple Dressing Change
- Page ID
- 10006
The health care provider chooses the appropriate sterile technique and necessary supplies based on the clinical condition of the patient, the cause of the wound, the type of dressing procedure, the goal of care, and agency policy.
Agency policy will determine the type of wound cleansing solution, but sterile normal saline and sterile water are the solutions of choice for cleansing wounds and should be at room temperature to support wound healing.
For more complex wounds with delayed healing, antiseptic solutions such as povidone iodine or chlorhexidene may be used for cleansing based on agency policy and the recommendation of a wound clinician or physician.
Checklist 33 outlines the steps for performing a simple dressing change.
Checklist 33: Simple Dressing ChangeDisclaimer: Always review and follow your hospital policy regarding this specific skill. |
|||
Safety considerations:
|
|||
Steps |
Additional Information |
||
| 1. Check present dressing with non-sterile gloves. | Use non-sterile gloves to protect yourself from contamination.
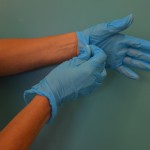
Apply non-sterile gloves |
||
| 2. Perform hand hygiene. | Hand hygiene prevents spread of microorganisms.
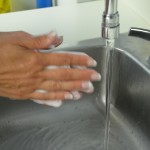
Perform hand hygiene |
||
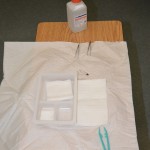
| 3. Gather necessary equipment. | Dressing supplies must be for single patient use only.
Use the smallest size of dressing for the wound. 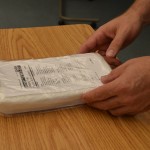
Gather supplies Take only the dressing supplies needed for the dressing change to the bedside. |
||
| 4. Prepare environment, position patient, adjust height of bed, turn on lights. | Ensure patient’s comfort prior to and during the procedure.
Proper lighting allows for good visibility to assess wound. |
||
| 5. Perform hand hygiene. | Hand hygiene prevents spread of microorganisms.
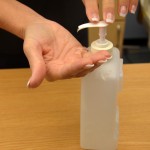
Hand hygiene with ABHR |
||
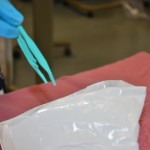
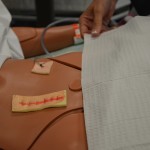
| 6. Prepare sterile field. |
Prepare sterile field |
||
| 7. Add necessary sterile supplies. |
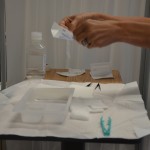
Add necessary supplies |
||
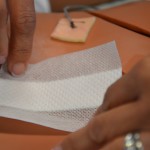
| 8. Pour cleansing solution. |
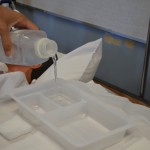
Pour sterile cleansing solution into sterile tray Normal saline or sterile water containers must be used for only one client and must be dated and discarded within at least 24 hours of being opened. |
||
| 9. Prepare patient and expose dressed wound. |
Prepare patient and expose wound |
||
| 10. Apply non-sterile gloves. | Use non-sterile gloves to protect yourself from contamination.
Apply non-sterile gloves |
||
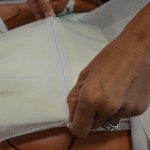
| 11. Remove outer dressing with non-sterile gloves and discard as per agency policy. |
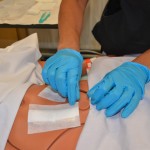
Remove outer dressing with non-sterile gloves |
||
| 12. Remove inner dressing with transfer forceps, if necessary. |
Remove inner dressing with transfer forceps |
||
| 13. Discard transfer forceps and non-sterile gloves according to agency policy. |
Discard transfer forceps as per agency policy 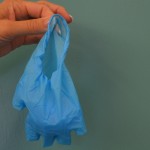
Discard gloves |
||
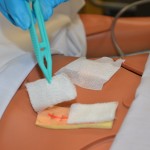
| 14. Assess wound. |
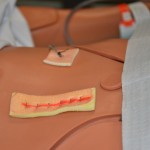
Assess wound |
||
| 15. Drape patient with water-resistant underpad (optional). | Water-resistant underpad protects patient’s clothing and linen.
Drape patient with water-resistant underpad |
||
| 16. Apply non-sterile gloves (optional). | Use non-sterile gloves to protect yourself from contamination.
Apply non-sterile gloves |
||
17. Cleanse wound using one 2 x 2 gauze per stroke. Strokes should be:
|
The suture line is considered the “least contaminated” area and is cleansed first.
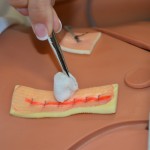
1. Using a sterile swab or gauze, clean the suture line by starting at the centre and working toward one end. 
2. With another sterile swab or gauze, start at the centre of the incision and work toward the other end.
3. All other cleansing involves moving from one end to the other on each side of the incision. 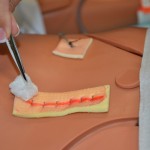
4. Work in straight lines, moving away from the suture line with each successive stroke. |
||
| 18. Cleanse around drain (if present). | If a drain is present, clean the drain site using a circular stroke, starting with the area immediately next to the drain.
Using a new swab, cleanse immediately next to the drain and attempt to clean a little further out from the drain. Continue this process with subsequent swabs until the skin surrounding the drain is cleaned. 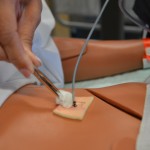
Cleanse around drain |
||
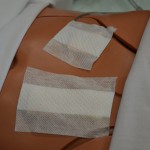
| 19. Apply inner dressing (4 x 4 gauze) with forceps to incision, then drain site (drain sponges/cut gauze). |
1. Cover incision 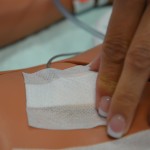
2. Cover drain site 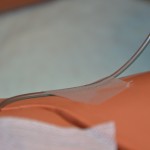
3. Tape drain tubing to skin |
||
| 20. Discard non-sterile gloves if they were used. | This step prevents the spread of microorganisms.
Discard gloves |
||
| 21. Apply outer dressing, keeping the inside of the sterile dressing touching the wound. | This step protects wound from contamination.
Apply outer dressing if required |
||
22. To complete dressing change:
|
Taking these step ensures the patient’s continued safety.
Hand hygiene with ABHR |
||
| 23. Document procedure and findings according to agency policy. | Record dressing change as per hospital policy.
Document the wound appearance, if the staples are intact, if the incision is well-approximated. Chart the time, place of wound, size, drainage and amount, type of cleaning solution, and dressing applied. State how the patient tolerated the procedure. Report any unusual findings or concerns to the appropriate health care professional. |
||
| 24. Compare wound to previous wound assessment and determine healing progress, if any. | If there is no movement toward healing, or if there is deterioration, notify the physician or wound care nurse according to agency policy. | ||
| Data source: BCIT, 2010a; Perry et al., 2014 | |||
Critical Thinking Exercises
- Your patient has a post-operative hip incision. You notice that the wound is slightly inflamed and not approximated, with some yellowish exudate present. What would be your next steps?
- As you select your supplies, you notice that the sterile saline container was opened exactly 24 hours ago. What would be your next steps?